Showing posts with label Rissas Designs. Show all posts

Sunday, October 6, 2013

Night At The Club

This tutorial was written on October 6, 2013
Any similarity to any other tutorial is purely coincidental


Gimp
Scrapkit "Night At The Club" by Rissas Designs
Tube by Verymany
Mask of choice


New Image 550x550 Transparency
Open Paper5, copy and close
Paste as new layer
Scale layer 550x550 and center in canvas
Open mask - Resize image 550x550
Apply mask (use the link above to use my basic tut for this)
Open Frame2, Copy and paste
Scale layer 70% and position in center of canvas
Using Free select tool and holding down SHIFT key select around each frame
Open Paper4
Scale image 550x550
Copy and close
Paste as new layer
Invert selection, delete and select none
In layers arrange Clipboard #2 layer below Clipboard #1 layer
Select Clipboard #1 layer
Open tube, copy and close
Paste as new layer
Resize 40%
Position in center of frame
Add dropshadow
Merge down 1x
Erase bottom of tube below inside edge of frame
Add the following elements to the frame (resize and add dropshadow as desired) Position them to your liking:


Ipod
Lipgloss
Mascara
Phone
Lipstick
Nail Polish
Ipod
Belt
Speakers
Heart Ribbon2

Merge Visible
Add copyright and Lic #
Merge Visible
Add name desired
Export .png


Wednesday, September 25, 2013

In The Dark of Night


This tutorial was written on September 24, 2013
Any similarity to any other tutorial is purely coincidental


Gimp
Kit: "Dark Night" by Rissas Designs
Tube: by Arthur Crowe
Mask: Mask3Sparkle by BellaLuna at Creative Misfits Creations

You can find a tutorial on how to apply a mask by clicking on the basic gimp tuts button in the menu above


New Image 650x650 Transparency
Open Paper 3, Copy and close
Paste as new layer
Open mask and apply
Open frame 3, copy and close
paste as new layer
scale layer 80%
Position frame in center of canvas
Using fuzzy selection tool click inside middle of frame
Grow selection 3
Open Paper 8, copy and close
Paste as new layer
invert selection - Delete - select none
In layers arrange clipboard #2 below Clipboard #1 and select clipboard #1
Open bow 2, copy and close
Paste as new layer
Scale layer 35% and position left edge of frame
Duplicate and arrange copy on right edge of frame
add dropshadow to both
Open birds, copy and close
Paste as new layer and in layers arrange birds below the bow and add dropshadow
In layers choose the bow
Open candle, copy and close
Paste as new layer
scale layer 60%
Arrange bottom left edge of frame
Duplicate - Mirror
Arrange bottom right edge of frame
give each candle a dropshadow
Open, Copy/paste, resize and position the following elements as desired. Don't forget dropshadows:


Dark Books
Butterfly
Skull2

open tube, copy and close
Paste as new layer
Scale layer 80%
Position center of canvas
add dropshadow

Merge Visible
Resize 600x594
Add Copyright and Lic#
Merge Visible
Add name desired
Export .png


Monday, September 16, 2013

Boo 2 U

This tutorial was written on September 16, 2013
Any similarity to other tutorials is purely coincidental.


Gimp
Scrapkit "Scary Business" by Rissas Designs
Poser Tube by Tammy PoserTuben
Mask of choice


New image 650x650 Transparency
open mask of choice
On your new image open Paper07
Copy and close
Paste as new layer
Open frame3, copy and close
Paste as new layer
Scale layer 80%
Center frame
Using fuzzy selection tool click in center of frame
Grow selection 3
Open paper4, copy and close
Paste as new layer
Invert selection - Delete - Select none
In layer palette arrange Clipboard #2 below Clipboard #1
In layer palette select Clipboard #1
open tube, copy and close
Paste as new layer
Resize 70%
Position left side of frame and add shadow
Open the following elements, copy, close, paste as new layer, resize as needed, position as desired, add a dropshadow


bat
candy 1
candy 2
cauldron
ghosts
poison
tree
skullsitting
pumpkin


Merge visible
scale image 600x596
Add Copyright and lic # if needed
Merge visible
Add name desired
export as .png


Monday, September 2, 2013

Sencitive


This tutorial was written on Sept 2, 2013
Any similarity to other tutorials is purely coincidental.


Kit "Sencitive" by Rissas Designs
Tube "Sencitive" by Arthur Crowe
Mask of choice


New Image 650x650 Transparency
Open Paper 2, copy and close
Paste as new layer
Apply mask (you can find a great tutorial on how to do that HERE)
Open Frame, copy and close
Paste as new layer, center in canvas
Using fuzzy selection tool click in center of frame
Grow selection 2
Open Disco Ball, Copy and close
Paste into, select none
Add dropshadow of choice
Open tube, copy and close
Paste as new layer
Resize 60% and add dropshadow
Open, copy/paste, resize and add dropshadow to the following elements (arrange as desired)


Swirl
Butterfly
Music Note 1
Music Note 2
Guitar
Music Notes
MiniIpod

Merge Visible
Scale Image 600x600
Add copyright and Lic#
Merge Visible again
Add name desired
Export as a .png


Wednesday, August 28, 2013

Sweet Suprise

This tutorial was written on August 18, 2013
Any similarity to any other tutorial is purely coincidental


Gimp
Scrapkit is "Cherry Cuppie" by Rissas Designs
Tube is a free tube by Verymany at Verymany Tubes
Mask of choice

Open Paper04, copy and close
Paste as new layer
Apply mask (you can follow a tutorial on using masks HERE)
Open Frame2, copy and close
Paste as new layer
Resize 70%
Using Rectangle Select around the inside of both frames
Open Paper 01, copy and close
Paste as new layer, invert selections and delete
Select none
In layers arrange Clipboard #2 below Clipboard #1
In layers select Clipboard #1
Open tube, copy large tube and close
Paste as new layer, resize 40%
Arrange in center of canvas
Add dropshadow

 Open the following elements, copy/paste, resize and position as desired. Add dropshadow to each element


*I do this because my tutorials are only guides and I want you to make your tag your own*

Flower1
HeartSwirl
Cakepop
CherryBranch
Cupcake02
IceCream01
IceCreamTreat
Shake

Merge Visible
Crop
Add Copyright and Lic#
Merge Visible
Add name desired
Export .png


Saturday, August 24, 2013

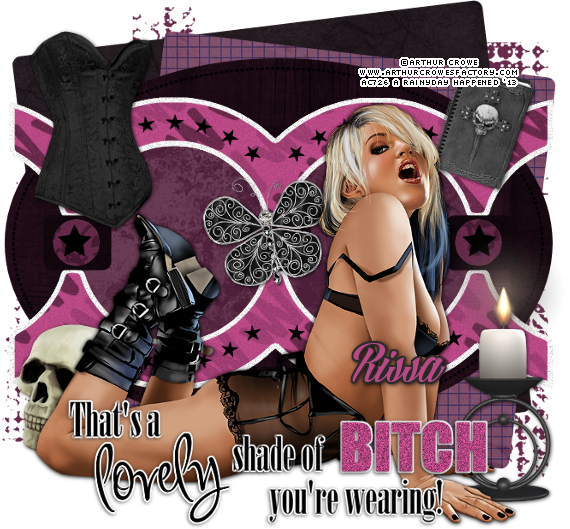
Bitch


This tutorial was written on August 23, 2013
Any similarity to any other tutorial is purely coincidental


Gimp
Scrapkit "Dark Night" by Rissas Designs
Tube by Arthur Crowe
Template by Dee


Open template and duplicate
Close original template
Delete Raster 1
In Layers select rust rectangle
right click on layer and select Alpha To Layer
Open paper 9, copy and close
Paste as new layer, invert selection and delete
Select none
Delete original template layer
In layers select teal square
right click on layer and select Alpha To Layer
Open paper 8, copy and close
Paste as new layer, invert selection and delete
Select none
Delete original template layer
In layers select brown oval
right click on layer and select Alpha To layer
Open paper 1, copy and close
Paste as new layer, invert selection and delete
Select none
Delete original template layer
In layers select rust shape center
right click on layer and select Alpha To Layer
Open paper 3, copy and close
Paste as new layer, invert selection and delete
select none
Delete original template layer
In layers select teal main shape
right click on layer and select Alpha To Layer
Open paper 4, copy and close
Paste as new lyaer, invert selection and delete
Select none
Delete original template layer
In layers select small teal squares
right click on layer and select Alpha To Layer
Open paper 10, copy and close
Paste as new layer, invert selection and delete
Select none
Delete original template layer
In layers select small brown circles
right click on layer and select Alpha To Layer
Open paper 5, copy and close
Paste as new layer, invert selection and delete
Select none
Delete original template layer
In layers select bitch rust
right click layer and select Alpha To Layer
New Layer and flood fill with b0447e
Add noise using these settings:

Select none and delete original template layer
In layers select wordart layer
Right click on layer and select Alpha To Layer
Grow selection 2, new layer
Flood fill ffffff
Select none
Arrange white wordart background just made below original wordart layer
IL select wordart layer and merge down 2x
Add dropshadow
Open tube, copy and close
Paste as new layer and resize if needed
Add the following elements, resize and place as desired. Give each element a dropshadow


Halftone
Skull
Candle
Butterfly
Corset
Book

In layers delete bg layer
Merge visible
scale image 600x561
Add copyright and lic #
Merge visible
Add name desired
Export as .png


Wednesday, August 21, 2013

Lets Party!

This tutorial was written on August 21, 2013
Any similarity to other tutorials is purely coincidental


Gimp
Tube by Sandra Chang-Adair at Artistic Dreams Imaging
Scrap kit "Night At The Club" by Rissas Designs
MaskBigMask015 by Vix

drop shadow: -2 / 2 / 5 / 50

New Canvas 700x700 Transparent
Open Frame 1
Copy and close
Paste as new layer
scale layer 80%
Arrange frame in center of canvas
Using fuzzy selection tool click in center of canvas
Grow selection 3
Open paper 7
copy and close
Paste as new layer
invert selection - delete - Select none
in layers arrange paper layer below frame layer
merge frame layer down 1x
Duplicate
Rotate -19.94
erase paper on bottom and right side of canvas
Duplicate
Rotate 36.31
Erase paper at bottom and right side of canvas
In layers select Background
Open paper 5
Copy and close
paste as new layer
apply mask (if you need a great tutorial on how to use masks you can go HERE)
in layers select top layer
open tube
copy and close
paste as new layer
scale layer 70%
arrange as desired
add drop shadow
add the following elements, resize as needed and add drop shadow to each

Disco Ball
Swirl 2
Ribbon 1
Speakers
IPod
Drink 1
Phone
Lipstick 2
Mascara
Purse
Nail Polish

Merge Visible
Resize 550x550
Add copyright and Lic #
Merge Visible
Add name desired
Export .png