Thursday, August 29, 2013

Autumn Bounty

THIS IS A SPECIAL PSP TUTORIAL!


This tutorial was written on August 19, 2013
Any similarity to any other tutorial is purely coincidental


PSPX2 (any version should work)
Scrapkit "Autumn Cove" by Thrifty Scraps by Gina
Tube is by Arthur Crowe
Mask of choice


New canvas 650x650 Transparent
Open Paper 07
Copy and close
Paste as new layer
Apply mask (tutorial HERE)
Open Window01
Copy and close
Paste as new layer
Duplicate and Flip
Arrange windows one slightly over the other (see my tag)
Add dropshadow to each window
Open Ivy01
Copy and close
Paste as new layer
Mirror and place at top of windows
add dropshadow
Open Leaf01
Copy - Close
Paste as new layer
Resize 35%
Mirror
arrange on left top corner of left window
Duplicate - Mirror and flip, arrange on the first set of leaves
Add a dropshadow to each
Open Flower01
Copy and close
Paste as new layer
Resize 35%
Arrange in center of leaves
add dropshadow
Open Bow01
Copy and close
Paste as new layer
Resize 35%
Position top right corner of right window
Add dropshadow
Open tube
Copy and close
Paste as new layer
Resize 55%
Position as desired
Add dropshadow
Using your point to point selection tool draw a selection around your windows
**You want the selection to be outside of the window panes but inside the outside edge of the windows**
Open paper03
Copy and close
Paste as a new layer
invert selection and delete
select none
In Layers arrange paper below bottom frame
In layers select Raster 6
Open Mushroom03
Copy and close
Paste as new layer
Arrange behind tube's ankles
add dropshadow
Open Squirrel02
Copy and paste
resize 60%
Position behind tube's feet
Add dropshadow
In layers select tube layer
Open the following elements, Copy/paste/resize as desired, add a dropshadow to each

Flower
Leaf03
Leaf04
Leaf06
Pincone01
Pinecones02
Squirrel01

Merge visible
Resize 600x600
Add copyright and Lic #
Merge visible
Add name desired
Save as .png


Wednesday, August 28, 2013

Sweet Suprise

This tutorial was written on August 18, 2013
Any similarity to any other tutorial is purely coincidental


Gimp
Scrapkit is "Cherry Cuppie" by Rissas Designs
Tube is a free tube by Verymany at Verymany Tubes
Mask of choice

Open Paper04, copy and close
Paste as new layer
Apply mask (you can follow a tutorial on using masks HERE)
Open Frame2, copy and close
Paste as new layer
Resize 70%
Using Rectangle Select around the inside of both frames
Open Paper 01, copy and close
Paste as new layer, invert selections and delete
Select none
In layers arrange Clipboard #2 below Clipboard #1
In layers select Clipboard #1
Open tube, copy large tube and close
Paste as new layer, resize 40%
Arrange in center of canvas
Add dropshadow

 Open the following elements, copy/paste, resize and position as desired. Add dropshadow to each element


*I do this because my tutorials are only guides and I want you to make your tag your own*

Flower1
HeartSwirl
Cakepop
CherryBranch
Cupcake02
IceCream01
IceCreamTreat
Shake

Merge Visible
Crop
Add Copyright and Lic#
Merge Visible
Add name desired
Export .png


Saturday, August 24, 2013

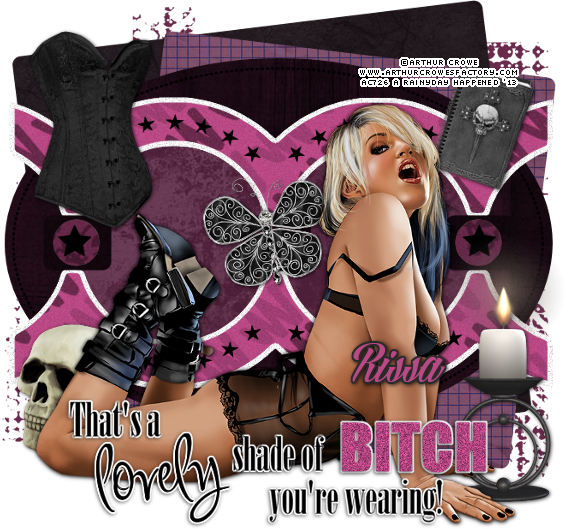
Bitch


This tutorial was written on August 23, 2013
Any similarity to any other tutorial is purely coincidental


Gimp
Scrapkit "Dark Night" by Rissas Designs
Tube by Arthur Crowe
Template by Dee


Open template and duplicate
Close original template
Delete Raster 1
In Layers select rust rectangle
right click on layer and select Alpha To Layer
Open paper 9, copy and close
Paste as new layer, invert selection and delete
Select none
Delete original template layer
In layers select teal square
right click on layer and select Alpha To Layer
Open paper 8, copy and close
Paste as new layer, invert selection and delete
Select none
Delete original template layer
In layers select brown oval
right click on layer and select Alpha To layer
Open paper 1, copy and close
Paste as new layer, invert selection and delete
Select none
Delete original template layer
In layers select rust shape center
right click on layer and select Alpha To Layer
Open paper 3, copy and close
Paste as new layer, invert selection and delete
select none
Delete original template layer
In layers select teal main shape
right click on layer and select Alpha To Layer
Open paper 4, copy and close
Paste as new lyaer, invert selection and delete
Select none
Delete original template layer
In layers select small teal squares
right click on layer and select Alpha To Layer
Open paper 10, copy and close
Paste as new layer, invert selection and delete
Select none
Delete original template layer
In layers select small brown circles
right click on layer and select Alpha To Layer
Open paper 5, copy and close
Paste as new layer, invert selection and delete
Select none
Delete original template layer
In layers select bitch rust
right click layer and select Alpha To Layer
New Layer and flood fill with b0447e
Add noise using these settings:

Select none and delete original template layer
In layers select wordart layer
Right click on layer and select Alpha To Layer
Grow selection 2, new layer
Flood fill ffffff
Select none
Arrange white wordart background just made below original wordart layer
IL select wordart layer and merge down 2x
Add dropshadow
Open tube, copy and close
Paste as new layer and resize if needed
Add the following elements, resize and place as desired. Give each element a dropshadow


Halftone
Skull
Candle
Butterfly
Corset
Book

In layers delete bg layer
Merge visible
scale image 600x561
Add copyright and lic #
Merge visible
Add name desired
Export as .png


Thursday, August 22, 2013

A World Away

This tutorial was written on August 22, 2013
Any similarity to any other tutorial is purely coincidental.


Gimp
Scrap kit "Blue Emo" by Inzpired Creationz
Mask of choice


New Canvas 700x700 Transparent
Open Paper 6
copy and close, paste as new layer
Apply mask (a great tutorial to learn to use masks HERE)
Open Frame 1
Copy and close, paste as new layer
Scale layer 70%
Using fuzzy selection tool click in center of frame
grow selection 3
Open Paper 5
Copy and close, paste as new layer
Invert selection and delete
Select none
In layers arrange paper you just made below frame layer
In layers select frame layer
Add dropshadow
Open tube, copy full size tube and close
Paste as new layer
Position in frame as desired and add dropshadow
Open the following elements, paste, resize and arrange as desired, add a dropshadow to each.

Bow 1
Charm 1
Ipod
Kitty
Winged Heart 2
Lolli 1
Lolli 2
Cupcake 2
Sparkles 1

Merge Visible
Crop
Image Resize 505x600
Add Copyright and Lic #
Merge Visible
Add name desired
Export .png


Wednesday, August 21, 2013

Lets Party!

This tutorial was written on August 21, 2013
Any similarity to other tutorials is purely coincidental


Gimp
Tube by Sandra Chang-Adair at Artistic Dreams Imaging
Scrap kit "Night At The Club" by Rissas Designs
MaskBigMask015 by Vix

drop shadow: -2 / 2 / 5 / 50

New Canvas 700x700 Transparent
Open Frame 1
Copy and close
Paste as new layer
scale layer 80%
Arrange frame in center of canvas
Using fuzzy selection tool click in center of canvas
Grow selection 3
Open paper 7
copy and close
Paste as new layer
invert selection - delete - Select none
in layers arrange paper layer below frame layer
merge frame layer down 1x
Duplicate
Rotate -19.94
erase paper on bottom and right side of canvas
Duplicate
Rotate 36.31
Erase paper at bottom and right side of canvas
In layers select Background
Open paper 5
Copy and close
paste as new layer
apply mask (if you need a great tutorial on how to use masks you can go HERE)
in layers select top layer
open tube
copy and close
paste as new layer
scale layer 70%
arrange as desired
add drop shadow
add the following elements, resize as needed and add drop shadow to each

Disco Ball
Swirl 2
Ribbon 1
Speakers
IPod
Drink 1
Phone
Lipstick 2
Mascara
Purse
Nail Polish

Merge Visible
Resize 550x550
Add copyright and Lic #
Merge Visible
Add name desired
Export .png


Monday, August 19, 2013

Sweet Lemonade

This tutorial was written on August 19, 2013
Any similarity to any other tutorial is purely coincidental.


Gimp
Tube by Melissa Diaz and can be purchased at Artistic Dreams Imaging
Scrapkit "LemonFaire" by Inzpired Creationz
Mask 0008 by Trese


New Canvas 700x700 Transparent
Open Paper 3
Copy and close
Paste as New layer
Apply mask (for a great tutorial on how to apply masks go HERE)
Open Frame 1
Copy and close
Paste As New Layer
Using fuzzy selection tool click in center of frame
Grow selection 3
Open Paper 7
Copy and close
Paste as new layer
Invert selection and delete
select none
In layers arrange frame above paper layer just made
Open tube and copy
Close tube
Paste on canvas as new layer
Position left side of frame and add dropshadow
In layers select frame
Open the following elements and place on frame adding a dropshadow to each. Arranging them to suit your tastes.

Spray 4
Flower 3
Pitcher 2
Ribbon 1
Lemon Slice 2
Nesting Bird

Merge visible
Resize canvas 550x550
Add copyright and Lic #
Merge Visible
Add name desired
Export .png


Saturday, August 17, 2013

Masks 0001 - 0005

Here's a set of masks that are .jpg format so can be used in Gimp or PSP.


Just Cuddles

This tutorial was written by me on August 17, 2013
Any similarity to other tutorials is purely coincidental

Supplies needed:

Gimp
Scrapkit "Mysteriously Emo" by Starz Creationz which can be purchased at Bee-NCreative4Less
Tube by Zlata_M at Pics For Design
Mask 0008 by Trese

Dropshadow used: -2 / 2 / 5 / 50


New Canvas 700x700 Transparent
Open Paper 7
Copy and close
Paste as New Layer
Open mask and apply (A great tutorial on masks can be found HERE)
Open F1
Copy and close
Paste as new layer
Arrange frame in center of large mask circle
Using fuzzy selection tool click in center of frame
Grow selection 3
Open P8
Copy and close
Paste as new layer
Invert selection and delete
Invert selection again
open tube and copy girl (do not close out we need the kitty)
On canvas paste as new layer
Scale layer 60%
Position tube in frame as though she is crawling out of the frame (see my tag)
Invert selection
Using the eraser erase the right side of the tube outside of the frame
Selecect none
Add dropshadow and merge down 1x into shadow
In layers arrange frame to top
In layers select tube and duplicate
Arrange duplicate to top of layers
In layers select the frame layer
Go back to your tube and copy the kitty
paste as new layer
arrange the kitty on the left hand side of canvas just behind the hand on the floor
add a dropshadow and merge down 1x into shadow
In layers select the top tube layer
Open and apply the following elements. Resize as needed and add a dropshadow to each


E2
E5
E21
E32
E49

Scale image 600x600
Add copryright and Lic # if needed
Merge Visible
Add name desired
Export .png


Thursday, August 15, 2013

Rockin'


This tutorial is written by me and any similarity to other tutorials is purely coincidental.


Supplies Used:

Scrapkit "Rockin' The Attitude" by A Space Between
Tube "Missy" by VeryMany at PicsForDesign
Mask "Mask3Sparkle" by Bella Luna at Creative Misfits Creations


New Canvas 700x700 Transparent (we can resize at the end of the tutorial)
Open Paper 7
Copy and close
Paste as a new layer
Apply mask (a great tutorial on how to do that HERE)
Open element 33
Copy and close
Paste as a new layer
scale layer 80%
Using fuzzy select tool click in center of frame
grow selection 3
Open paper 14
Copy and close
Paste as a new layer
invert selection and delete
invert selection
copy close up of tube
Paste as a new layer
scale layer 70%
position as desired
invert selection and delete
Select none
in layers arrange frame layer to top of layers
select tube layer and duplicate
on the bottom tube layer give soft glow (glow radius 10 / brightness .86 / sharpness .85
add dropshadow
On top tube layer change mode to screen
in layers select frame layer
close mask layer
Merge visible
open mask layer and arrange it below the merged layer
in layers select top layer
add dropshadow
copy full size tube
Paste as New layer
flip horizontal
resize 55%
arrange on right edge (torn side) of frame
add dropshadow
Use the following elements and resize as needed. Don't forget dropshadows on each.

Element 13
Element 38
Element 52
Element 57
Element 65
Element 69
Element 7
Element 26
Element 23

Merge visible
Scale Image 500x501
Add Copyright and lic #
Merge Visible
Add name
Export .png


Tuesday, August 13, 2013

Almost Done

Whew!!
I'm still setting this up but have got quite a bit done in one day. I'll have stamps up and a few other sidebar items tomorrow and then it's off to tut land I go. I'll have some masks and a template or 10 by the end of the weekend. It's slow going until the layout and stuff is finished. I'm looking forward to sitting back with a cup of coffee and getting into Gimp for you. I cannot wait for things to fall together...hopefully by Monday the latest.