
This tutorial was written on september 22, 2013
Any similarity to any other tutorial is purely coincidental.
Gimp
Tube "Lolly" by Ninaste at Beehive Studio
Scrapkit "Dangerously Alluring" by Pink Paradox Productions
Mask by me (OOO5) HERE
New Image 650x650 Transparency
Open P 22, copy and close
Paste as new layer
Open mask and apply (you can find my tut on how to do that HERE)
Open F 1, copy and close
Paste as new layer
Scale layer 60% and position in center of canvas
Using fuzzy selection tool click in center of frame
Grow selection 3
Open P 14, copy and close
Paste as new layer
Invert selection, delete, invert selection
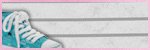
Open tube, copy and on your canvas paste as new layer
Mirror
Arrange in selection as desired
Change opacity to 61.3
Select none
Paste as new layer
Resize 35%
Arrange on left side of canvas
Add dropshadow
open, copy/close, paste as new layer, resize and position the following elements as desired:
29
126
40
Merge visible
Resize 600x595
Add copyright and lic #
Merge visible
Add name desired
Export .png


No comments:
Post a Comment